How to Set Up Wi-Fi on Chromebook: A Step-by-Step Guide
Making sure your Chromebook is connected to a reliable Wi-Fi network is crucial for accessing the internet, working on cloud-based applications, and downloading updates. In this article, we will guide you through the simple process of setting up your Chromebook to Wi-Fi. This comprehensive guide will walk you through the necessary steps, helping you connect your Chromebook to Wi-Fi in no time.
Step One: Turn On Your Chromebook
The first step to connecting your Chromebook to Wi-Fi is to turn it on. If your Chromebook is off, simply press the power button to turn it on. Once your Chromebook is on, you should see the startup screen. This is where the magic begins!
Step Two: Check Your Wi-Fi Status
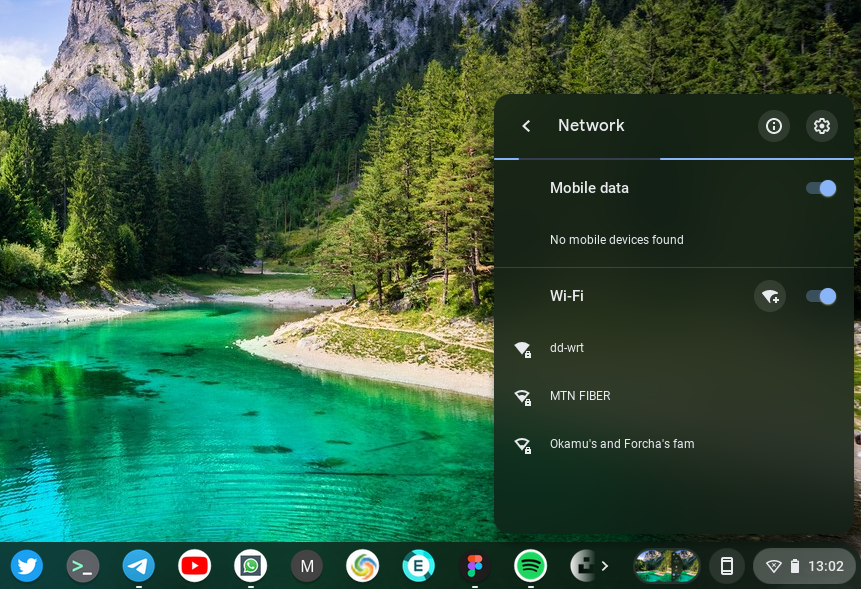
On your Chromebook, at the bottom right, select the time. If you find your Wi-Fi network name and a signal strength, your Chromebook is already connected to Wi-Fi. Your Chromebook will automatically look for available networks and show them to you in a list.
Now, if your Chromebook is not connected to a Wi-Fi network, you will see a list of nearby networks. Look for your network name (SSID) and select it to connect. Enter your Wi-Fi password if prompted.
Step Three: Configure Auto-Connection Preferences
Once you've connected to a network, you may want to set up auto-connection preferences. To do this, follow these steps:
- Click the time at the bottom right corner of your screen.
- Click on the Wi-Fi network you're connected to.
- Click on the three dots at the top right corner of the screen.
- Click on "Network settings."
- Under "Network preferences," select "Auto-connect on start-up." This will automatically connect to the last network you used when you start your Chromebook.
Step Four: Set Preferred Networks
Setting preferred networks on your Chromebook ensures that your device connects to your favorite networks first. To do this, follow these steps:
- Click the time at the bottom right corner of your screen.
- Click on the Wi-Fi network you want to set as a preferred network.
- Click on the three dots at the top right corner of the screen.
- Click on "Network settings."
- Under "Network preferences," select "Preferred networks." Add your preferred network to the list, and delete any others.
Step Five: Obtain MAC or IP Addresses
MAC and IP addresses are essential for connecting your Chromebook to specific devices or networks. To obtain your MAC address:
- Click the time at the bottom right corner of your screen.
- Click on the Wi-Fi network you're connected to.
- Click on the three dots at the top right corner of the screen.
- Click on "Network settings."
- Under "Network details," click on "Wi-Fi settings."
- Your MAC address will be displayed under "Wi-Fi MAC address."
Alternative method: If your Chromebook is not connected to a Wi-Fi network, you can also obtain your MAC address by going to Settings > Network > Wi-Fi settings. In the "Wi-Fi settings" section, you'll find your MAC address.
Conclusion
Setting up your Chromebook to Wi-Fi is a straightforward process that requires just a few steps. By following these steps, you'll be able to connect your Chromebook to a reliable Wi-Fi network, ensuring seamless access to the internet and cloud-based applications. With this guide, you're now equipped with the knowledge to connect your Chromebook to Wi-Fi in no time!
After connecting your Chromebook to Wi-Fi, you can enjoy a faster and more efficient browsing experience. If you face any issues or have questions, feel free to leave a comment below or consult our extensive library of technote tutorials for additional guidance.
Why Choose Our Guide?
Our step-by-step guide provides an easy-to-understand, comprehensive, and SEO-friendly approach to setting up Wi-Fi on your Chromebook. We've included detailed explanations of each step, ensuring that you can follow along with confidence. Additionally, we've optimized our content with relevant keywords, making it easier for you to find this guide when searching for how to set up Wi-Fi on a Chromebook.

![[Chromebook] Connecting to Wi-Fi on Your Chromebook - ASUS](https://i.ytimg.com/vi/qKnHLsXiY9o/maxresdefault.jpg "[Chromebook] Connecting to Wi-Fi on Your Chromebook - ASUS")
")


")


 | HP® Support")

 - HP")

