How to Set Up Printer on MacBook Air: A Comprehensive Guide
In today's digital age, having a reliable printer is essential for both personal and professional use. Whether you're a student, working professional, or entrepreneur, a printer can help you achieve your goals. However, setting up a printer on your MacBook Air can be a daunting task, especially if you're new to Mac. In this article, we'll guide you through the step-by-step process of setting up a printer on your MacBook Air, making it easy and hassle-free.
Before You Begin
Before we dive into the setup process, ensure that your MacBook Air and printer are connected to the same Wi-Fi network. If your printer supports wireless printing, this should be relatively straightforward. However, if your printer requires a wired connection, make sure you have a USB cable and a free USB port on your MacBook Air.
Method 1: Adding a Printer via Wi-Fi
Adding a printer via Wi-Fi is one of the easiest methods. Here's how to do it:
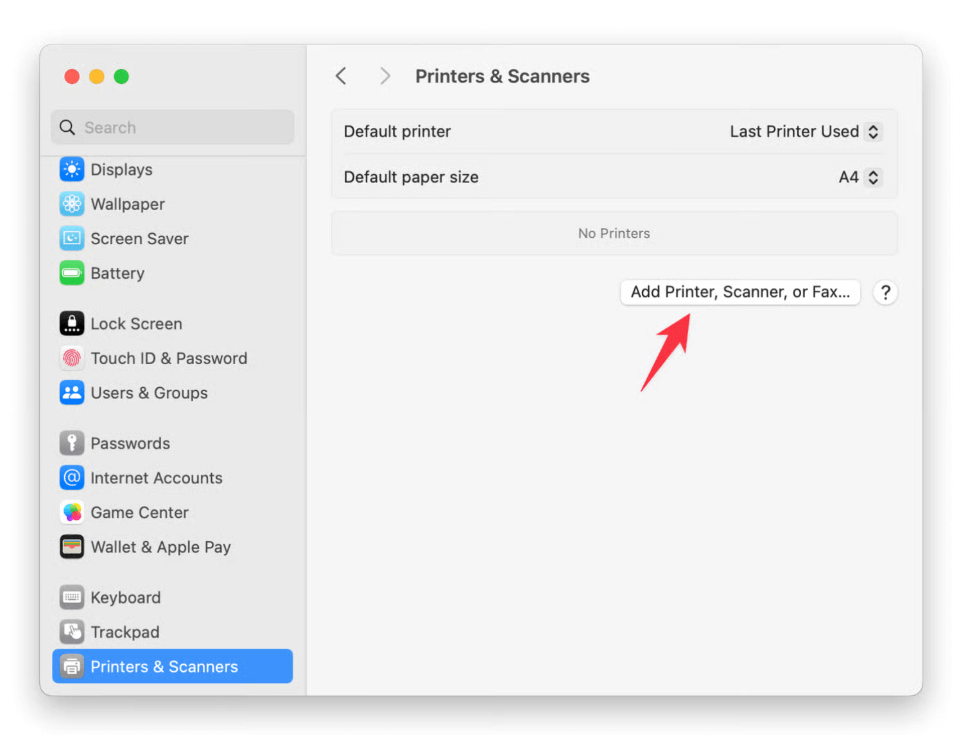
- Go to System Preferences on your MacBook Air and select "Printers & Scanners."
- Click the "+" button at the bottom of the list to add a new printer.
- Choose the option to add a printer via Wi-Fi.
- Follow the on-screen instructions to select your printer from the list of available printers.
- Enter the Wi-Fi password for your network, if prompted.
- Wait for the printer to be added to your MacBook Air.
Method 2: Adding a Printer via USB
If your printer requires a wired connection, here's how to add it via USB:
- Connect the USB cable to your MacBook Air and printer.
- Go to System Preferences on your MacBook Air and select "Printers & Scanners."
- Click the "+" button at the bottom of the list to add a new printer.
- Choose the option to add a printer via USB.
- Wait for the printer to be detected and added to your MacBook Air.
Method 3: Adding a Printer via IP Address
If your printer doesn't support AirPrint or has a static IP address, you can add it manually via the IP address. Here's how to do it:
- Go to System Preferences on your MacBook Air and select "Printers & Scanners."
- Click the "+" button at the bottom of the list to add a new printer.
- Choose the option to add a printer via IP address.
- Enter the IP address of your printer in the format XX.XX.XX.XX.
- Enter the printer's name and select the print queue.
- Wait for the printer to be added to your MacBook Air.
Troubleshooting Tips
If you encounter any issues during the setup process, here are some troubleshooting tips to help you resolve the problem:
- Make sure your printer and MacBook Air are connected to the same Wi-Fi network.
- Restart your printer and MacBook Air to ensure they're properly configured.
- Check the printer's manual for specific setup instructions.
- Consult the manufacturer's website for firmware updates or driver downloads.
Conclusion
Setting up a printer on your MacBook Air can seem daunting, but with these step-by-step instructions, you should be able to do it easily. Remember to follow the specific setup instructions for your printer model, and don't hesitate to reach out to the manufacturer's support team if you encounter any issues. With this comprehensive guide, you'll be printing like a pro in no time.


")


